Hi all!
I’ve been working on a new project called n8n-nodes-tidbyt. It allows you to interact with your Tidbyt device settings, generate images from Pixlet source code, and push images to your device using n8n.
n8n is a free open-source workflow automation tool, enabling you to connect anything to everything.
Node Operations
- List Available Apps
- List Installations
- Delete Installation
- Get Device Details
- Update Device Details
- Push to device
- Render Pixlet code
 Tidbyt API
All functionality exposed by the Tidbyt API is available. I’m using the node-tidbyt module I built.
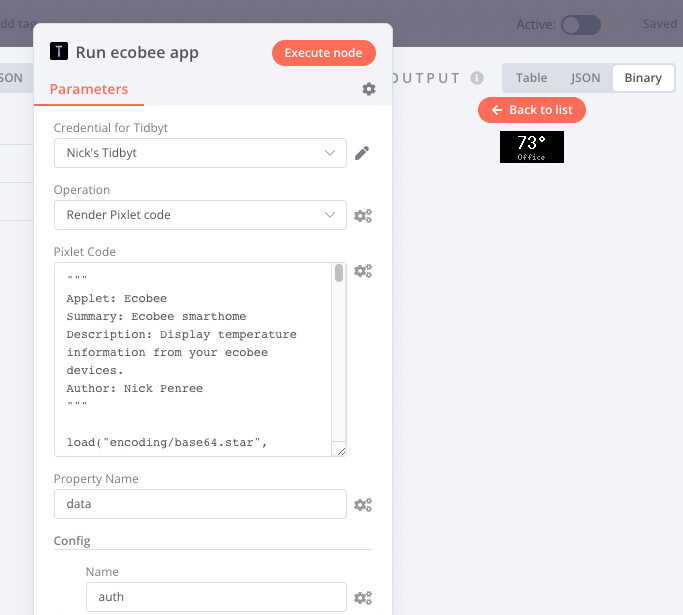
 Pixlet Code Rendering!
One of the biggest challenges newcomers face is getting Pixlet built and running on their local machine. Pixlet is a robust application with several dependencies like:
- Go
- libwebp
- make
- Node.js
Adding on to some modifications to Pixlet that @fxb has been working on to target a WebAssembly runtime, I’m happy to report that this node will render WebP images from unaltered Pixlet source code with no external installs or dependencies. Pixlet does not need to be installed separately.
I’ve tested this on several architectures including Apple M1, Ubuntu Linux 64-bit, and my Pi 4 running PiOS on 32-bit ARM.
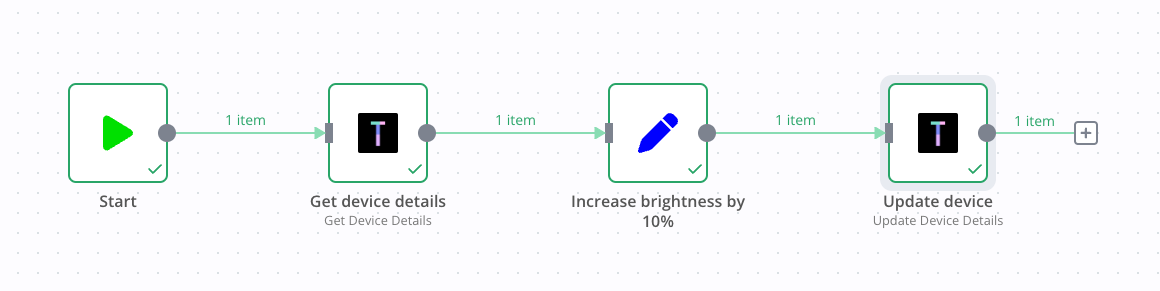
Here is an example workflow that gets the current brightness and increases it by 10%:
 Config
You can send key-value pairs that will be accessible in the config of your Pixlet application.
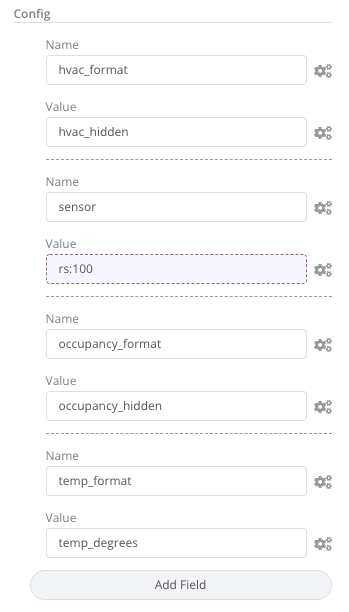
Combining Expressions in n8n with config in PIxlet allows you to leverage other nodes in n8n to do the heavy lifting, like getting data from a Google Sheet or GraphQL endpoint.
This can save time you time by not having to write all of your integration code in Starlark, allowing you to use Starlark mostly for UI and layout on the device.
 Updating apps
Since Pixlet apps are rendered to WebP animations, they don’t update on their own. You can leverage different nodes in n8n to help keep your installations up to date.
Using the Cron node, you can schedule rendering and/or pushes to your devices.
Here is an example workflow that updates the temperature reading every five minutes:

Using Trigger nodes, you can react to events in external systems like new TypeForm submissions or new Shopify orders and display something on your Tidbyt device.
Next steps
1. Install n8n
n8n is free and available on their website. You can follow their self-hosted Getting Started guide.
2. Install n8n-nodes-tidbyt
Once you have n8n installed, you can install n8n-nodes-tidbyt using npm to make it available:
To get started install the package in your n8n root directory:
npm install n8n-nodes-tidbyt
For Docker-based deployments, add the following line before the font installation command in your n8n Dockerfile:
RUN cd /usr/local/lib/node_modules/n8n && npm install n8n-nodes-tidbyt
Note:
n8n is working on making it possible to install Community nodes directly within their web interface so this process should get a little easier soon.
This is all still a work-in-progress, but it is working! If you’re feeling adventurous, give it a try.
Where do I report issues?
If you have an issue with n8n-nodes-tidby, please open a GitHub issue on the Github repository.